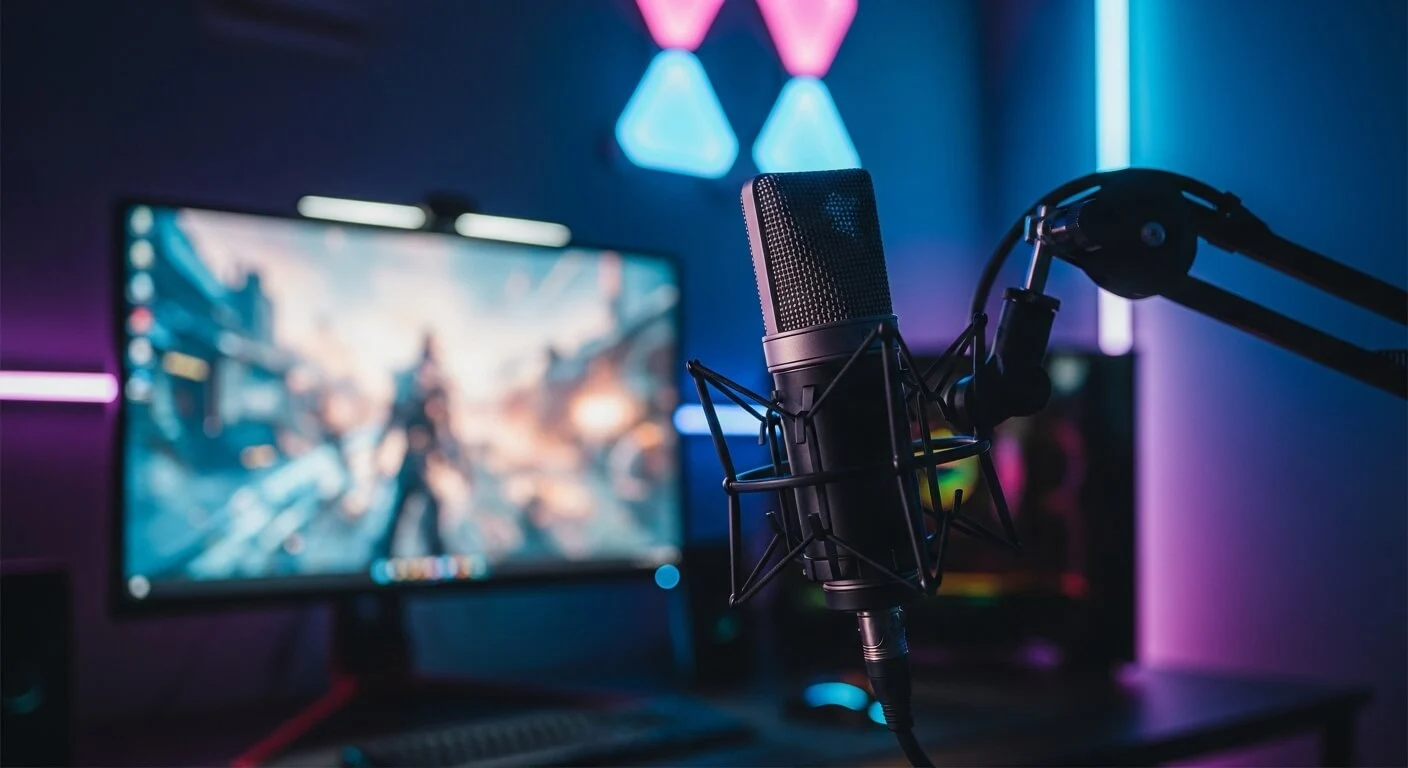
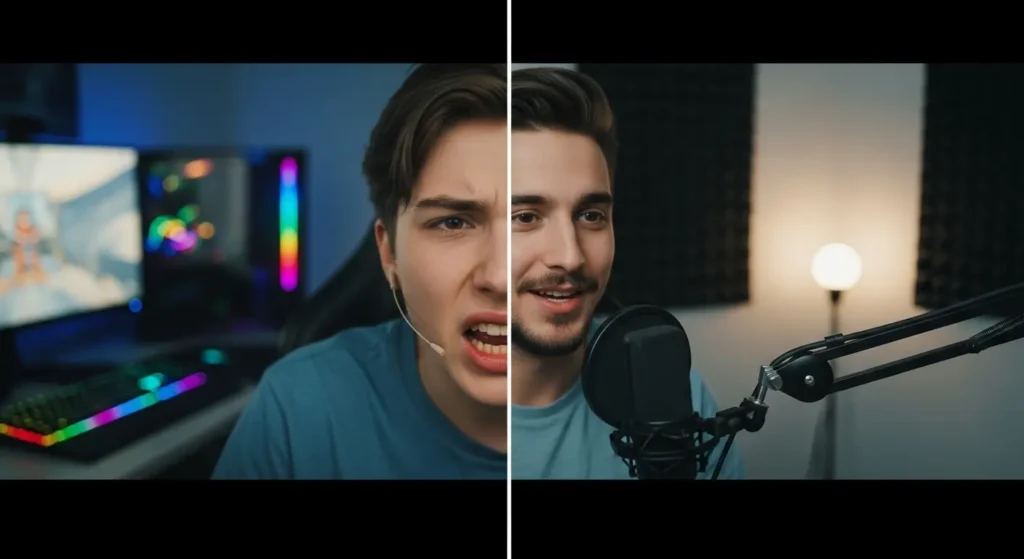
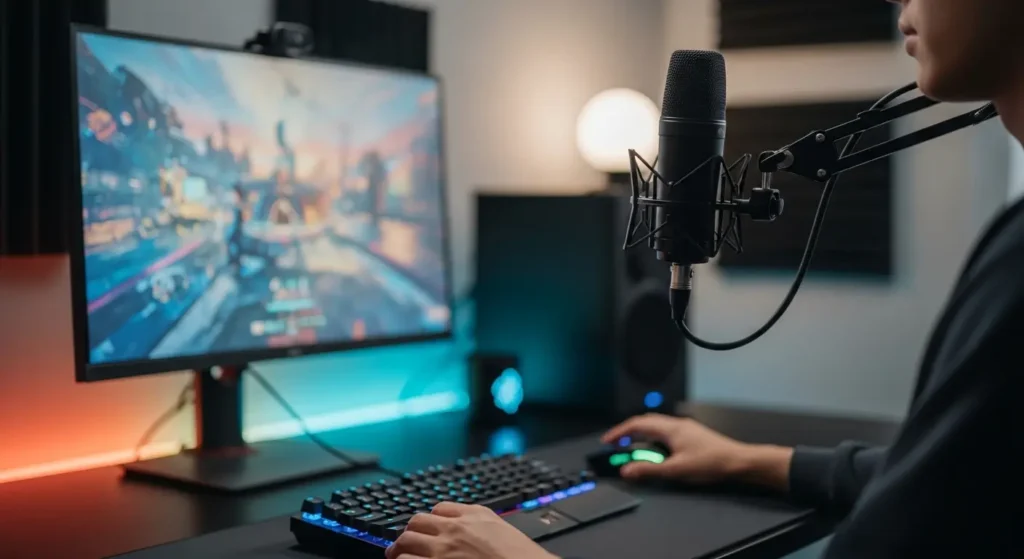
You’ve done it. You’ve assembled the perfect gaming rig, calibrated your high-refresh-rate monitor, and your mechanical keyboard sounds like a symphony of victory. But when you speak, your teammates say, “Sorry, can you repeat that? You sound like you’re in a tunnel.” Or worse, your stream audience hears every click, clack, and whir of your PC more clearly than your own voice.
This is the moment every serious gamer and aspiring streamer faces. It’s the realization that audio isn’t just an afterthought—it’s half the experience. Your voice is your primary tool for communication, connection, and entertainment. When it’s muffled, distorted, or lost in a sea of background noise, your effectiveness plummets.
The microphone built into your gaming headset is a marvel of engineering for its size, but it is fundamentally a compromise. It’s designed for convenience, not quality.
This guide is your pathway to breaking free from that compromise. We are going to embark on a journey to find the perfect dedicated microphone for you. We will demystify the technical jargon, explain the science of sound capture, and lay out a clear, step-by-step process for choosing a mic that will make your voice sound as crisp, clear, and professional as the rest of your setup.
By the end of this guide, you will understand the critical difference between USB and XLR, master the concept of polar patterns, and know exactly what features to look for to ensure your voice is always heard, loud and clear.
Why Your Headset Mic Isn’t Cutting It Anymore
Before we explore the world of dedicated microphones, let’s establish why you’re right to seek an upgrade. Why does a standalone microphone make such a profound difference? The answer lies in physics and design intent.
The microphone capsule on a gaming headset is incredibly small, often just a few millimeters in diameter. It has to be, to remain lightweight and unobtrusive. This tiny size limits its ability to capture the full, rich frequency range of the human voice. It often results in audio that sounds thin, compressed, or “nasally”—the classic “radio chatter” sound profile. It does the job for basic callouts, but it lacks presence and professional polish.
A dedicated microphone, by contrast, is built with a single purpose: to capture sound with the highest possible fidelity.
- Larger Diaphragms: Standalone mics use significantly larger diaphragms (the component that vibrates in response to sound waves). A larger diaphragm can move more freely and accurately, allowing it to capture a much wider and more detailed range of frequencies. This is what gives your voice that rich, warm, “broadcast” quality.
- Superior Electronics: The internal components—the preamplifiers and analog-to-digital converters—are of a much higher caliber. They provide a cleaner signal with a lower noise floor, meaning less unwanted hiss and electrical interference.
- Purposeful Design: A dedicated mic isn’t an add-on; it’s the main event. Its entire housing, grille, and internal shock mounting are engineered to work together to produce the best possible sound.
While all-in-one gaming headsets are fantastic solutions for convenience and integrated audio, a dedicated microphone is not just an incremental improvement; it is a transformative upgrade. It’s the single biggest step you can take to elevate your communication from functional to professional.
The First Big Decision: USB vs. XLR
Your journey into high-quality audio begins with a single, fundamental choice. This decision will define your setup’s complexity, your total budget, and your capacity for future upgrades. It is the very foundation upon which your entire audio chain will be built.
This is the choice between the two main types of microphone connections: USB and XLR. Each path offers distinct advantages and caters to different types of users, from the plug-and-play streamer to the dedicated audio enthusiast. It’s crucial to understand that there is no single “better” option here. The goal of this section is not to declare a winner, but to give you the knowledge to confidently decide which of these two excellent paths is unequivocally better for you.
USB Microphones: The Plug-and-Play Champions
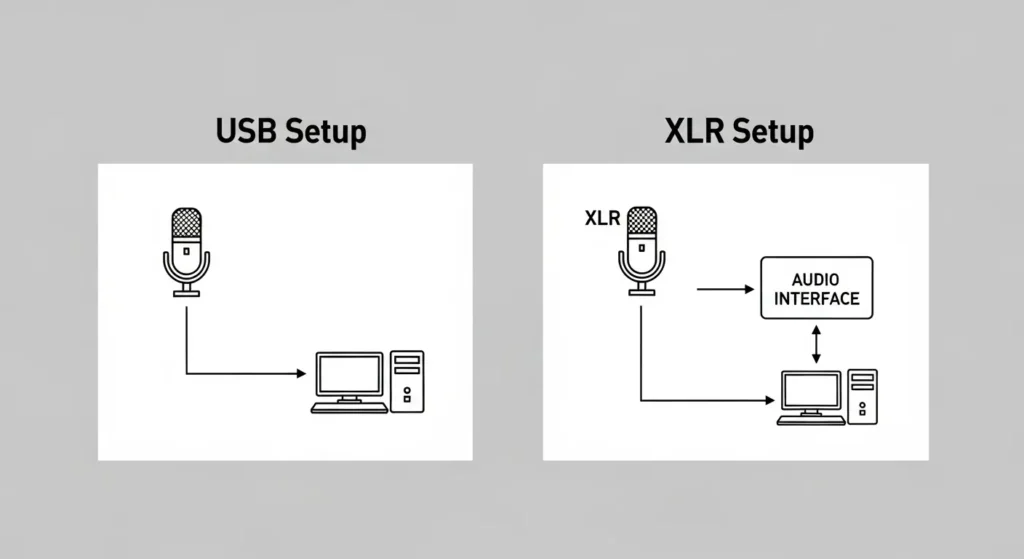
A USB microphone is a marvel of modern convenience. It is an all-in-one audio solution, containing the microphone capsule, a preamplifier (to boost the signal), and an analog-to-digital converter (to turn the sound into data your computer understands) all within a single device. It connects to your PC or console directly via a standard USB cable.
- How it Works: You plug it in. You select it as your audio input in Windows, macOS, or your streaming software. You start talking. It’s truly that simple.
- The Pros:
- Simplicity: The setup process is virtually nonexistent, making it incredibly beginner-friendly.
- Cost-Effectiveness: Because you don’t need to buy any additional hardware, the total cost of entry is significantly lower.
- Portability: A single mic and a cable are easy to pack up and move.
- The Cons:
- Limited Upgradability: You are locked into the components inside the mic. If you want a better-sounding microphone capsule or a cleaner preamp, you have to replace the entire unit.
- Single Input: You can generally only use one USB microphone at a time on a computer without complex software workarounds.
- Best For:
- The vast majority of gamers who want a massive audio upgrade without any hassle.
- Streamers who are just starting out and want to focus on their content, not their tech.
- Anyone who values a clean, minimalist desk setup.
- Prime Examples: HyperX QuadCast S, Blue Yeti, Rode NT-USB+.
XLR Microphones: The Professional Standard
An XLR microphone is the traditional, professional standard you see in recording studios, radio stations, and on concert stages. It is a purely analog device. It outputs a low-level analog signal through a robust, three-pin connector called an XLR cable. By itself, an XLR microphone cannot connect to a computer.
- How it Works: The XLR mic connects via an XLR cable to a separate, external device called an Audio Interface. This interface contains high-quality preamps and analog-to-digital converters. The audio interface then connects to your computer via USB.
- The Pros:
- Superior Sound Potential: The separation of components allows for higher-quality, dedicated preamps in the audio interface, often leading to a cleaner, more detailed, and lower-noise signal.
- Ultimate Upgradability & Flexibility: This is the key advantage. You can upgrade your microphone or your audio interface independently as your needs and budget evolve. You can also connect multiple XLR mics to interfaces with multiple inputs for podcasts or multi-person streams.
- Professional Durability: XLR cables are balanced and lock into place, making them far more rugged and resistant to interference over long distances.
- The Cons:
- Higher Cost of Entry: You must purchase two pieces of hardware: the microphone and an audio interface (like a Focusrite Scarlett Solo or Audient EVO 4).
- Increased Complexity: The setup involves more components, cables, and software drivers. You will need to learn the basics of setting gain levels on an external device.
- Best For:
- Serious streamers who view their audio quality as a core part of their brand.
- Content creators who also produce podcasts, voiceovers, or music.
- Enthusiasts who enjoy the process of building a high-performance, modular audio chain.
- Prime Examples: Rode Procaster (Dynamic), Shure SM7B (Dynamic), Rode NT1 (Condenser) paired with a Focusrite or Audient interface.
A Quick Verdict: Which Path is Right for You?
Let’s simplify the decision:
- Choose USB if: Your priority is simplicity, convenience, and achieving a fantastic result with minimal fuss and a lower initial investment.
- Choose XLR if: You see audio as a serious, long-term hobby or profession. You want the absolute best quality possible and value the flexibility to upgrade your system piece by piece over time.
How Microphones Hear: The Secret to Crystal-Clear Audio
You’ve successfully chosen your foundational path—USB or XLR. Now, we must move from the type of connection to the very nature of how a microphone hears. This is where we learn to control our audio environment with scientific precision.
The single most important factor in achieving clean audio and rejecting unwanted background noise is not just the mic’s quality, but its Polar Pattern. Understanding this core concept is the key to silencing the distracting clicks of your keyboard and the whir of your PC fans. This is the professional’s secret weapon. Mastering the use of polar patterns will have a more significant impact on your sound quality than almost any other setting or feature. Let’s demystify this powerful tool.
What is a Polar Pattern? (And Why It Matters)
Think of a polar pattern as the microphone’s built-in “listening zone” or field of hearing. It’s a three-dimensional shape around the microphone capsule that determines how sensitive it is to sounds coming from different directions.
Imagine you have a flashlight. You can have a very wide beam that illuminates an entire room (a floodlight), or a very narrow, focused beam that only lights up what you point it at (a spotlight). Polar patterns are the audio equivalent of this. Choosing the right “beam” is the key to capturing your voice while ignoring everything else.
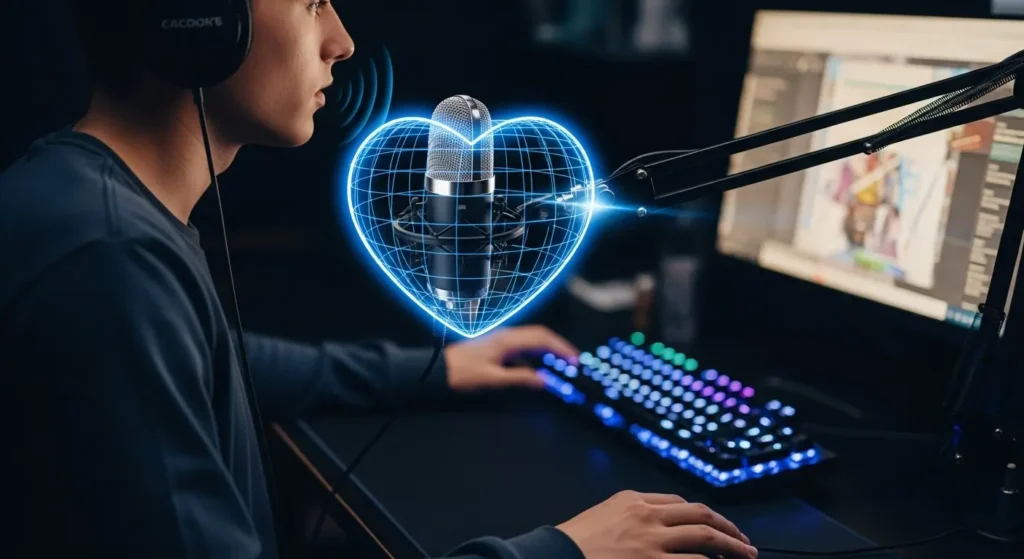
Cardioid: The Gamer’s Best Friend
For 99% of solo gaming and streaming applications, the Cardioid pattern is your hero.
A cardioid pattern is heart-shaped (hence the name). It is most sensitive to sound coming directly from the front of the microphone and progressively less sensitive to sounds from the sides. Most importantly, it actively rejects sound coming from the rear.
This is the magic feature that helps you combat keyboard noise.
When you position a cardioid microphone correctly—with the front aimed at your mouth and the rear aimed at your keyboard—it naturally suppresses the distracting clicks and clacks. It focuses its “hearing” on your voice, effectively deafening itself to the noises behind it. This is why many “streaming” microphones feature a cardioid pattern as their primary setting.
Other Common Patterns: When to Use Them
While cardioid is your go-to, many popular USB mics (like the HyperX QuadCast S or Blue Yeti) are multi-pattern, offering other useful options:
- Supercardioid/Hypercardioid: Think of this as an even more focused spotlight than cardioid. It has a tighter pickup area in the front and even greater rejection from the sides. However, it does have a small lobe of sensitivity directly at the rear. It’s excellent for noisy environments if you can position it perfectly.
- Bidirectional (Figure-8): This pattern captures sound equally from the front and the rear, while rejecting sound completely from the sides. Its only practical use for a gamer or streamer is a two-person, face-to-face interview or podcast where both people share a single microphone.
- Omnidirectional: This pattern captures sound equally from all directions—a full 360-degree sphere. It’s the “floodlight.” This is useful for capturing the sound of an entire room, such as a group discussion or a D&D session around a table, but it’s the worst choice for a solo streamer as it will pick up every single ambient noise.
Your Physical Setup: From Your Desk to Your Voice
You could own the most expensive microphone in the world, but if it’s positioned poorly, it will sound terrible. Audio quality is not determined by price tag alone. Your physical setup—specifically, how and where you place the microphone—is just as critical as the hardware itself. Proper placement is the secret ingredient that unlocks a microphone’s true potential.
Desktop Stands vs. Boom Arms: The Placement Problem
Most USB microphones come with a small desktop stand. While convenient for getting started, these stands are often the source of poor audio quality for two main reasons:
- Vibration Transfer: The stand sits directly on your desk. Every tap of your fingers, every bump of your mouse, every vibration from your typing is transferred directly through the desk, up the stand, and into the microphone as a low-frequency “thump” or rumble.
- Poor Positioning: A desktop stand forces the microphone to be far away from your mouth. This leads us to the most important principle of microphone placement.
The solution to both problems is a boom arm. This is an articulated arm that clamps to the edge of your desk and holds your microphone, allowing you to position it perfectly in the air. It is, without question, the single most important accessory you can buy. A $100 mic on a $50 boom arm will sound infinitely better than a $300 mic on a desk stand.
The Proximity Principle: Why Closer is Better
Here is a pro-audio secret that will transform your sound quality: get the microphone as close to your mouth as is comfortably possible (typically 4-6 inches).
When the microphone is close to your mouth, your voice is the loudest thing it hears. This allows you to turn down the microphone’s gain (its sensitivity level). By turning down the gain, you make the microphone less sensitive to quieter, more distant sounds—like your keyboard, your PC fans, and the echo of your room.
Closer Mic = Lower Gain = Less Background Noise. It’s that simple. A boom arm makes achieving this proximity effortless.
Must-Have Accessories: Shock Mounts and Pop Filters
To further professionalize your setup, two small accessories make a huge difference.
- Shock Mount: This is a specialized cradle that suspends your microphone using elastic bands. It mechanically isolates the microphone from the stand or boom arm. This is your final line of defense against any bumps, vibrations, or handling noise. Many high-end mics and boom arms come with one included.
- Pop Filter (or Foam Windscreen): When you say words with hard “p” and “b” sounds, you create a burst of air that can overwhelm the microphone’s diaphragm, resulting in a distorted, unpleasant “popping” sound called a plosive. A pop filter is a screen (usually made of nylon mesh or metal) that you place between your mouth and the microphone to diffuse this burst of air. A foam windscreen that fits over the mic serves the same purpose.
Beyond the Hardware: Key Features and Software Integration
The modern microphone landscape, especially in the thriving USB market, extends far beyond the physical hardware. The most innovative brands understand that user-friendly features and powerful software are what truly complete the package, elevating a good product into a great one.
These integrated features provide a level of on-the-fly control that was once reserved for professional broadcast studios. Physical buttons for muting and knobs for gain adjustment are no longer just conveniences; they are essential tools for managing your audio without ever needing to leave your game or interrupt your stream.
Furthermore, the accompanying software suites have become just as important as the microphone itself. These digital ecosystems can transform your device into a full-fledged virtual mixing station, offering a degree of customization and power that dramatically enhances the value of your investment. Let’s explore these crucial elements.
Essential On-Board Controls: Mute Buttons & Gain Knobs
Look for microphones that offer direct, physical controls. These are quality-of-life features that you will use constantly.
- Tap-to-Mute Button: A physical button or touch-sensitive surface on the microphone that allows you to instantly mute your audio is invaluable. It’s far quicker and more reliable than fumbling for a software mute button when you need to cough, sneeze, or have a private conversation. Look for one with a clear visual indicator (e.g., a red LED) to show when you are muted.
- Gain Knob: A physical knob on the microphone to control its sensitivity is incredibly useful. It allows you to make quick adjustments on the fly without having to tab out of your game and dive into sound settings.
Zero-Latency Monitoring: Hearing Yourself Perfectly
Many USB microphones feature a 3.5mm headphone jack on the bottom. This is not for plugging the mic into a camera. This is for zero-latency direct monitoring.
It allows you to plug your headphones directly into the microphone and hear your own voice in real-time, exactly as the microphone is capturing it, with no perceptible delay or echo. This is absolutely critical for streamers, as it lets you constantly monitor your audio levels, ensure you’re not too loud (clipping) or too quiet, and confirm that your voice sounds clear without any distracting echo.
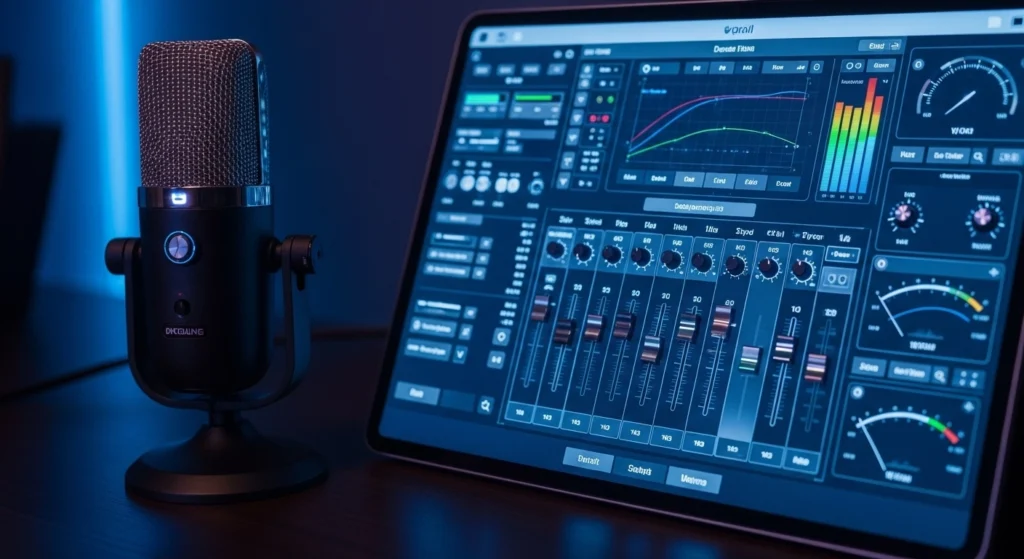
The Power of Software Suites
In 2025, the hardware is only half the story. Top brands differentiate themselves with powerful software ecosystems that unlock a new level of control.
- Virtual Mixers: Software like Elgato’s Wave Link or Rode’s Unify are game-changers. They allow you to create a complete audio mix on your computer, combining your microphone audio with game audio, Discord, music, and browser sounds into separate channels. You can control the volume of each source independently for yourself and for your stream, giving you the power of a physical broadcast mixer, but entirely in software.
- Audio Processing (VST Support): These software suites often allow you to add VST (Virtual Studio Technology) plugins directly to your microphone channel. This means you can add professional effects like a noise gate (to automatically mute the mic when you’re not speaking), an equalizer (EQ) (to shape the tone of your voice), or a compressor (to even out your volume levels) without any extra hardware.
When choosing a mic, consider the power of its accompanying software. A good software suite can dramatically increase the value and functionality of the microphone.
Ready to Find Your Voice? Our Top Picks for 2025
You are now an informed buyer. With a firm grasp of the critical choice between USB and XLR, you’re already ahead of the curve. Understanding that a cardioid polar pattern is your best defense against keyboard noise gives you a tactical advantage in creating clean audio. The importance of a boom arm and the Proximity Principle are no longer mysteries; they are tools in your arsenal. Looking at a product page is no longer an exercise in confusion—it’s an opportunity to see how each feature directly serves your needs.
The knowledge is now yours.
Applying this expertise to the best products on the market today is the logical next step. To help you make that final choice with confidence, we’ve put in the hours testing, analyzing, and comparing the top contenders.
For our detailed reviews and specific recommendations, see our complete guide to the 10 Best Microphones for Gaming and Streaming in 2025.
Frequently Asked Questions (FAQ)
Q1: How do I stop my microphone from picking up my keyboard?
This is a multi-step process: 1) Use a Cardioid polar pattern. 2) Use a boom arm to position the mic closer to your mouth. 3) Aim the front of the mic at your mouth and the rear (the null point) at your keyboard. 4) Turn down the microphone’s gain. 5) If your software supports it, add a subtle noise gate plugin.
Q2: Do I really need an audio interface and an XLR mic for streaming?
No, you do not need one. A high-quality USB microphone like a HyperX QuadCast S or Rode NT-USB+ is more than capable of producing professional-grade audio for 95% of streamers. You should only go the XLR route if you are a dedicated audio enthusiast who wants the absolute peak of quality and the flexibility of a modular system.
Q3: What is the difference between a condenser and a dynamic microphone?
This is an excellent, advanced question. In simple terms:
- Condenser Mics (like the Blue Yeti or most USB mics) are more sensitive and detailed. They are fantastic at capturing the nuances of a voice in a quiet, treated room but can also be more susceptible to picking up background noise.
- Dynamic Mics (like the Shure SM7B or Rode Procaster) are less sensitive and far more durable. They are exceptional at rejecting background noise and are the standard for radio broadcast because they excel in untreated rooms. They often require more gain to drive properly.